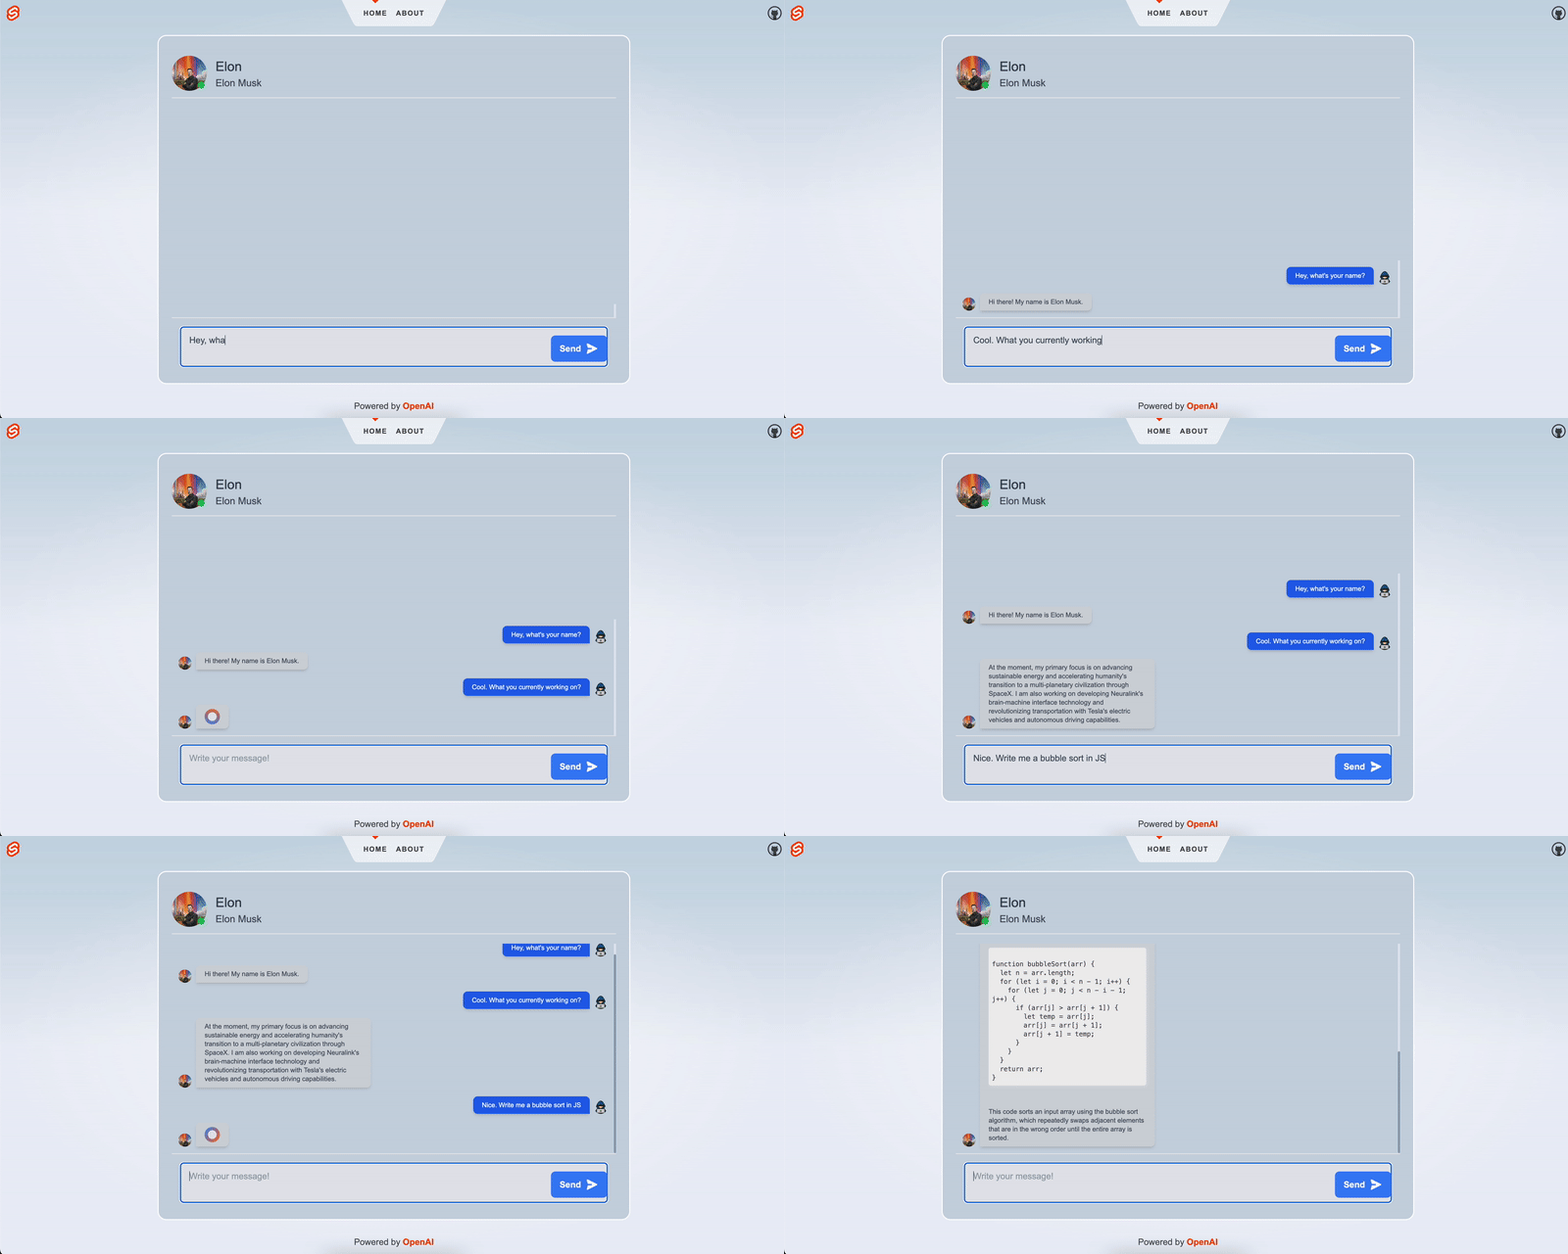
Here’s what we’ll be building in just a minute:
The create-svelte-chatgpt package enables you to effortlessly set up a SvelteKit application integrated with ChatGPT, the powerful language model by OpenAI. This package comes with a pre-built chat interface, saving you time on design and implementation. As a demonstration of what you can achieve with this package, we’ll walk through the process of creating a chatbot that impersonates a specific character. Even if you’re not familiar with Svelte, you can easily follow along and get started.
Prerequisites
Before we begin, ensure you have the following:
- Node.js installed on your system
- An OpenAI API key (you can obtain one from the OpenAI dashboard)
Step 1: Install the create-svelte-chatgpt package
Execute the following command in your terminal:
npx create-svelte-chatgpt@latest
This command prompts you for a project name, and then generates a new SvelteKit application with ChatGPT preconfigured.
Step 2: Configure your API key and environment
cd into your project directory, create a .env file in the root directory of your new project and add your OpenAI API key. Optionally, you can also provide a Redis URL and password for persistent chat history.
OPENAI_API_KEY=xxx
REDIS_URL=yyy # Optional
REDIS_PASSWORD=zzz # Optional
Step 3: Customize the chatbot character
Navigate to the src/lib/config/index.ts file. You’ll find a createConfig() function that returns an object containing various properties related to the chatbot character. To customise the character, modify the following properties:
-
nickName: The nickname for your character. -
fullName: The full name of the character. -
receiverImgSrc: The URL or path to the image representing the character. - senderImgSrc: The URL or path to the image representing the user.
-
promptPrefix: A prefix added to user input to guide the AI (e.g., “Act as Elon Musk, “).
For instance, you can alter the configuration to simulate a conversation with Elon Musk:
export function createConfig() {
  return {
    nickName: 'Elon',
    fullName: 'Elon Musk',
    receiverImgSrc: 'https://i.imgur.com/zUAmDNj.png' // This was generated via MidJourney!,
    senderImgSrc: senderImg,
    promptPrefix: 'Answer this as if you were Elon Musk: nn'
  };
}
Step 4: Run the application
Start a development server by executing the following command in your terminal:
npm run dev
Now, open your browser and visit http://localhost:5173 to interact with your chatbot character.
Conclusion
The create-svelte-chatgpt package serves as a boilerplate for building chatbot applications with Svelte and ChatGPT. Now that you have a solid foundation in place, you can expand and customise your application to suit your needs. The possibilities are endless, happy coding!


